Recurring Payments
Rent, loan installment, Netflix, Spotify — lots of payments repeat every month. Instead of remembering each one, configure them once, and Finansify will remind you and track whether you've paid.
Template vs instance
To understand how payments work in Finansify, you need to know two concepts:
- Template (payment plan) — the definition of a recurring payment. E.g. "Rent: 1,500 PLN, monthly, starting January 1"
- Instance (payment) — a specific occurrence. E.g. "Rent for March: 1,500 PLN, due March 1"
A template automatically generates instances. You manage the template, and Finansify creates the individual payments.
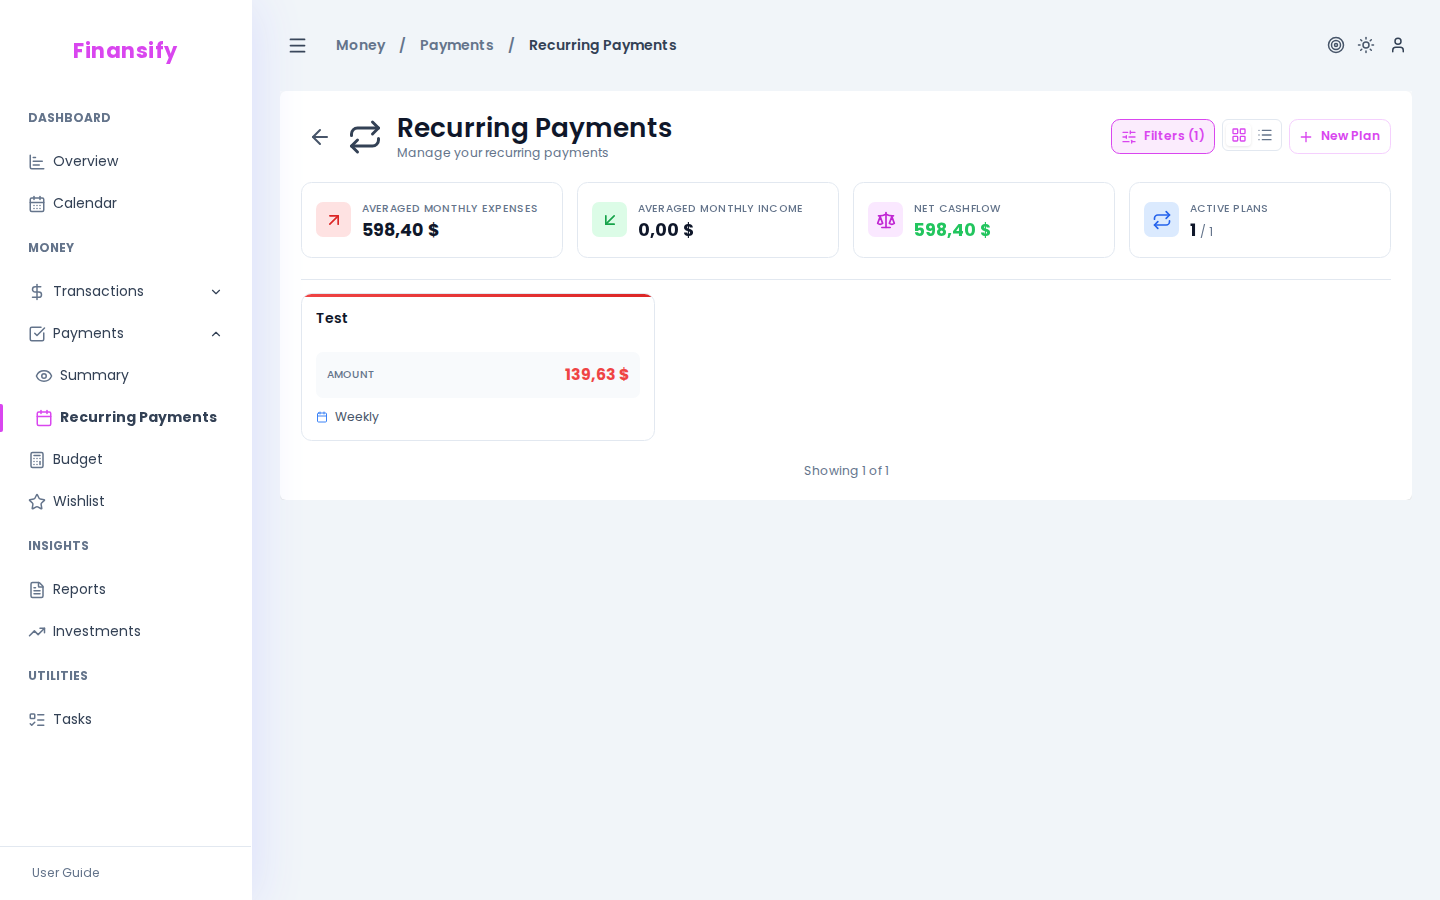
Template list (Planner)
On the Recurring payments → Planner page you can see all your payment templates.
Each template card shows:
- Colored side bar (green = income, red = expense)
- Name and notes
- Amount
- Category (with path)
- Frequency (e.g. "Monthly")
- End date (if set)
 Payment template list
In advanced mode a summary appears above the list: estimated monthly expenses, estimated monthly income, net balance, number of active plans.
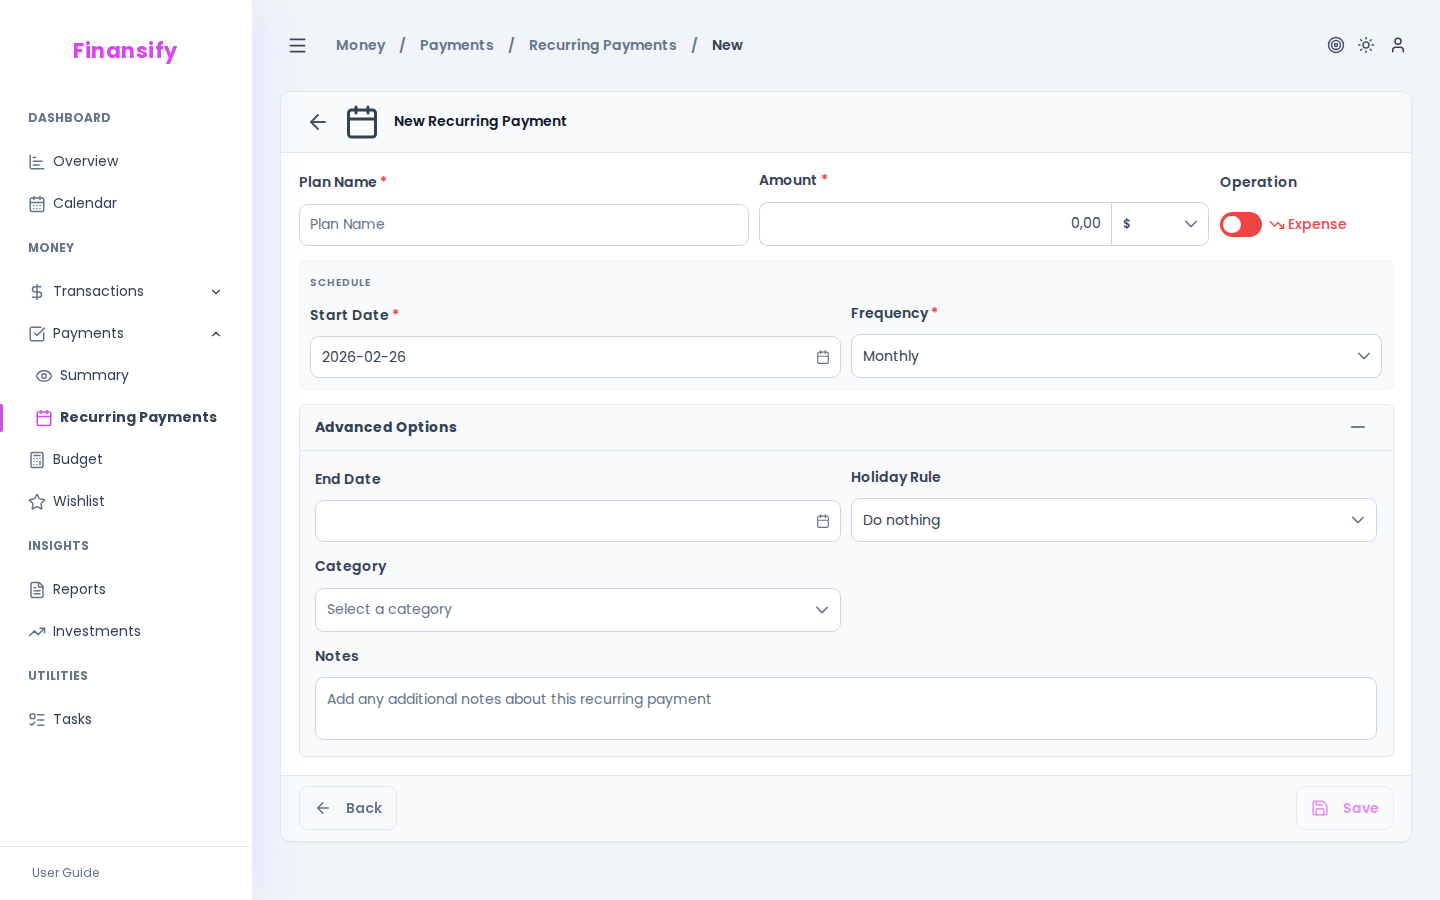
Creating a payment template
- Click New recurring payment
- Fill in the form:
| Field | Description | Required |
|---|---|---|
| Name | E.g. "Rent", "Netflix", "Salary" | Yes |
| Amount + currency | How much the payment is | Yes |
| Operation type | Expense or Income | Yes |
| Start date | When the cycle begins | Yes |
| Frequency | How often it repeats | Yes |
Frequencies
| Frequency | Description |
|---|---|
| One-time | Only once (e.g. a course installment) |
| Daily | Every day |
| Weekly | Once a week |
| Biweekly | Once every two weeks |
| Monthly | Once a month (most common) |
| Quarterly | Once every 3 months |
| Semi-annually | Once every 6 months |
| Annually | Once a year |
Advanced options
| Field | Description |
|---|---|
| End date | When the cycle ends (optional) |
| Holiday rule | What to do when the due date falls on a weekend/holiday |
| Category | Assign a transaction category |
| Notes | Additional information |
Holiday rules
When a payment due date falls on a non-working day:
- Don't change — the due date stays as-is
- Previous business day — move to the last business day before the due date
- Next business day — move to the first business day after the due date
 New recurring payment form
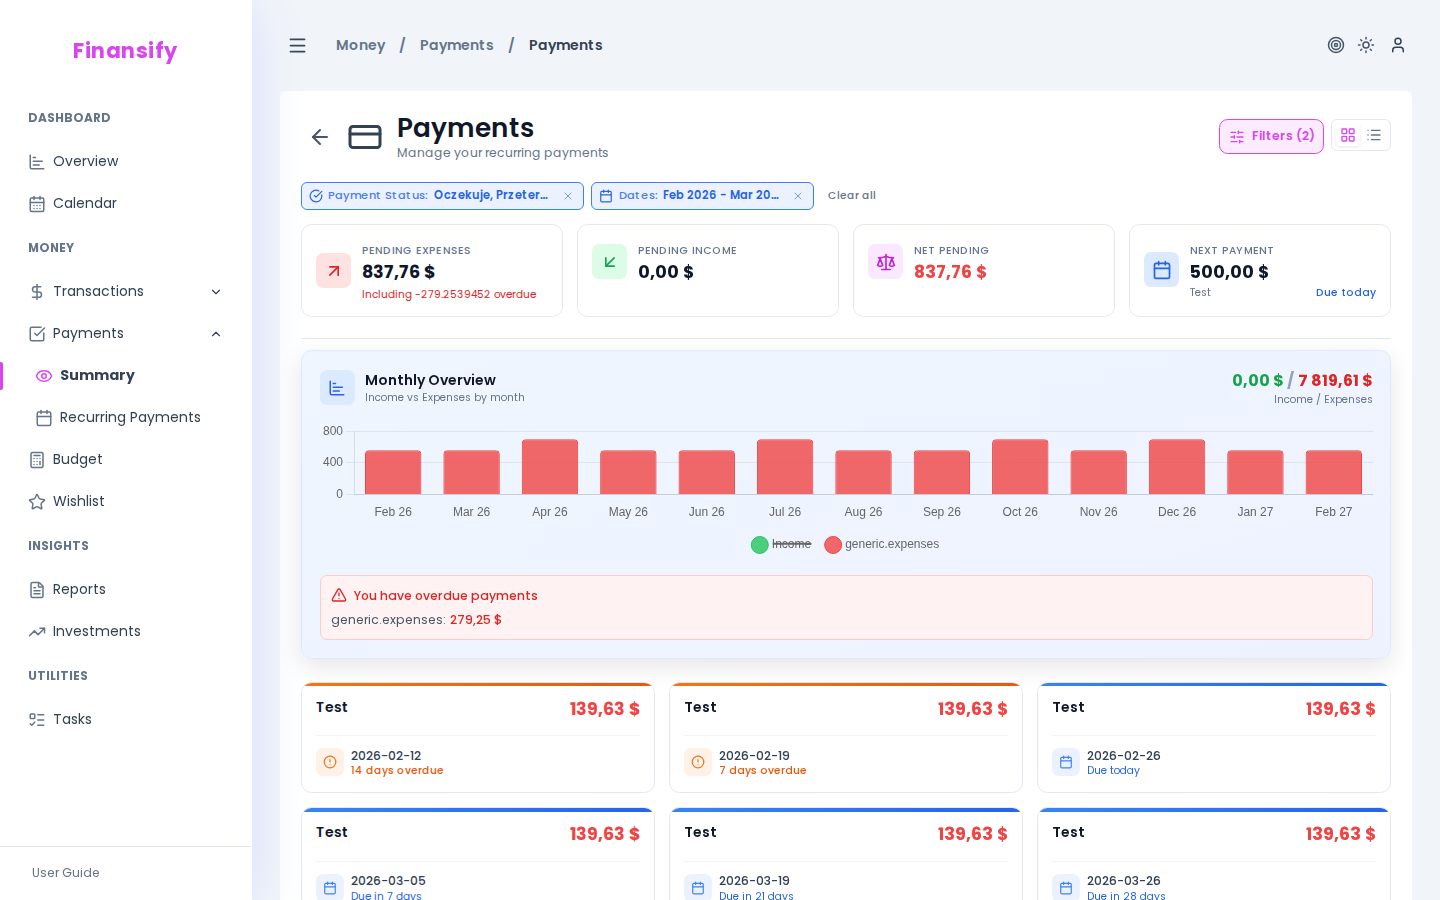
Payment list (instances)
On the Recurring payments → Summary page you can see all upcoming and historical payment instances.
Each instance has a status:
| Status | Appearance | Meaning |
|---|---|---|
| Pending | Calendar icon, "in N days" | Payment is coming up |
| Overdue | Warning icon, "N days past due" | Due date has passed and you haven't paid |
| Paid | Check icon, payment date | Payment completed |
| Cancelled | Prohibition icon, cancellation date | Payment cancelled |
 Payment instance list
Filtering instances
| Filter | What it does |
|---|---|
| Operation | Expenses / Income |
| Status | Pending / Overdue / Paid / Cancelled |
| Date range | Show payments from a given period |
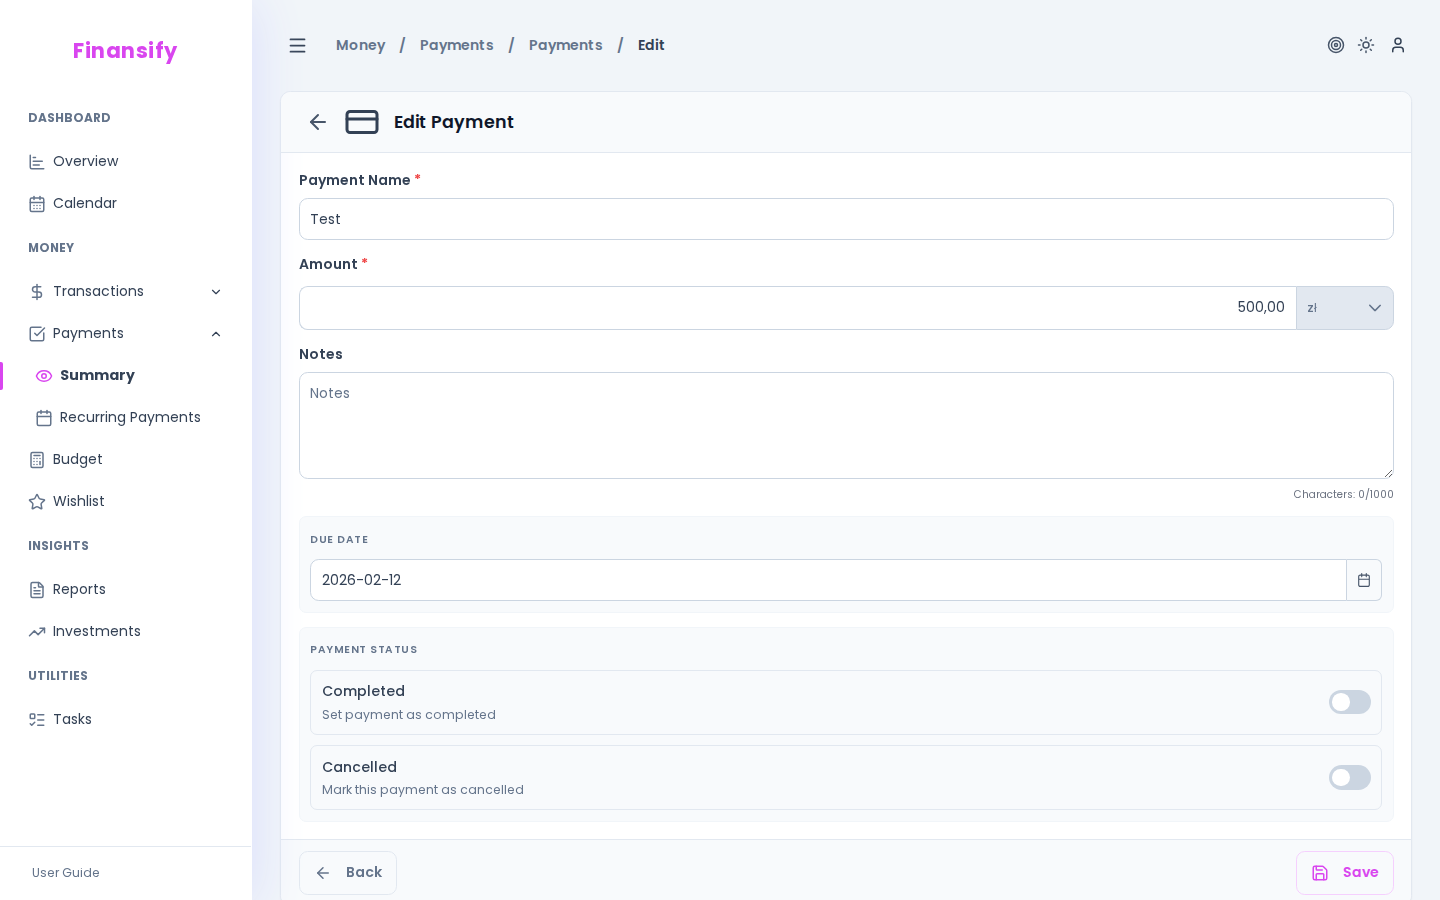
Marking a payment as paid
When you pay a bill, mark the payment:
- Open the payment instance (click Edit)
- Enable the Paid toggle
- Choose the linking method:
- Search for a transaction — find an existing transaction and link it to the payment
- Create a new transaction — create a transaction automatically from the payment data
- Enter a date — enter only the payment date (without linking to a transaction)
The linked transaction will be visible in the payment details — with name, amount, and date.
 Payment edit form
Cancelling a payment
If a payment is no longer needed (e.g. you cancelled a subscription), enable the Cancelled toggle. A cancelled payment remains in the history but is not counted among upcoming ones.
Rescheduling
You can manually change the date of a payment instance (e.g. you paid early). When editing a modified date you'll see a Restore button — it reverts to the original due date from the template.
Modified instances have a special marker so you know the date was changed manually.
Editing and deleting templates
Editing
Some template fields are locked after creation (start date, frequency, operation type, category, holiday rule). This is because changing those fields would affect already generated instances.
You can change: name, amount, currency, end date, notes.
Deleting
Deleting a template removes it along with future unrealized instances.
See also:
- Payment proposals — AI detects recurring payments automatically
- Transactions — linking payments to transactions
- Calendar — payments on the calendar
- Dashboard — upcoming payments widget